

Dans cet article nous allons voir comment contrôler individuellement les LEDs d’un ruban led WS2812b. Ces rubans sont composés de LEDs RGB (Red, Green, Blue > rouge, verte, bleue) dans lesquelles est intégré un microcontrôleur. Permettant de les contrôler individuellement l’une de l’autre tente au niveau de la couleur que de la luminosité.
Il est tout à fait possible d’imaginer contrôler ce ruban à l’aide d’un NodeMCU, la façon de procéder serait sensiblement la même. Mais pour cet article je vais me concentrer sur son utilisation avec un Arduino Uno.
Pour cet article nous allons donc avoir besoin d’un Arduino Uno, d’un ruban led WS2812b et d’une alimentation.
CE DONT VOUS AUREZ BESOIN
Un ruban led WS2812b
Un Arduino Uno
Une alimentation
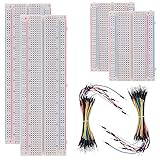
Quelques câbles de prototypage rapide
Une platine de prototypage rapide

![ARDUINO UNO REV3 microprocesseur d'Arduino [A000066]](https://m.media-amazon.com/images/I/51txW1iicVL._SL160_.jpg)
Branchement d’un ruban led ws2812b à l’arduino
Pour s’assurer de contrôler l’intensité, la luminosité et de la couleur des LED le ruban sera branché sur une broche PWM.
Sur l’Arduino uno les broches PWM sont représentés par le symbole suivant : ~
Il s’agit donc des broches : 3, 5, 6, 9, 10, 11.
Le ruban led lui pouvant être très gourmand en énergie sera branché sur une alimentation à part.
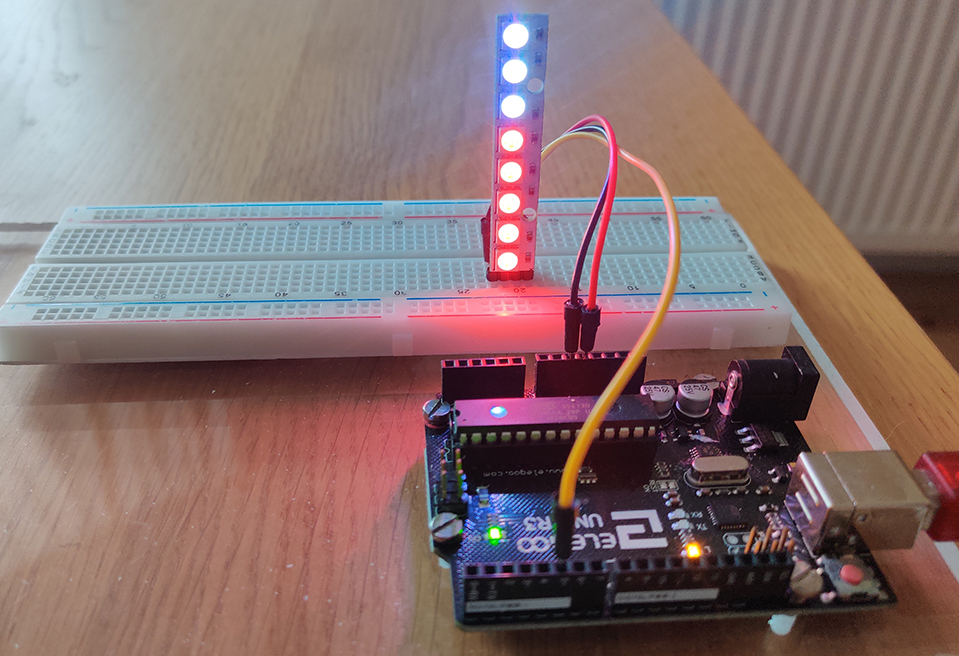
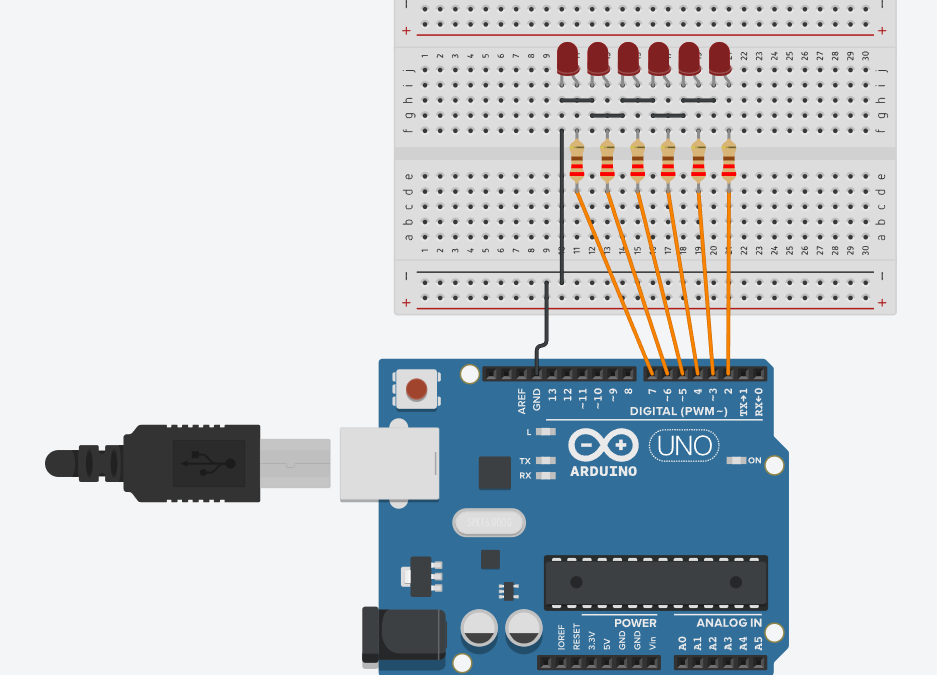
Branchez comme ci-dessous:
- DIn > pin 5 de l’Arduino
- VCC > 5V de l’Arduino
- GND > GND de l’Arduino
Le code Arduino
Pour contrôler le ruban nous allons utiliser la librairie FastLED.h. il existe plusieurs librairies dédiées à ce type de rubans. Cependant cette librairie me semble être la plus simple à utiliser.
Pour cela rendez-vous dans « croquis » > « importer une bibliothèque » > « Gérer les bibliothèques »
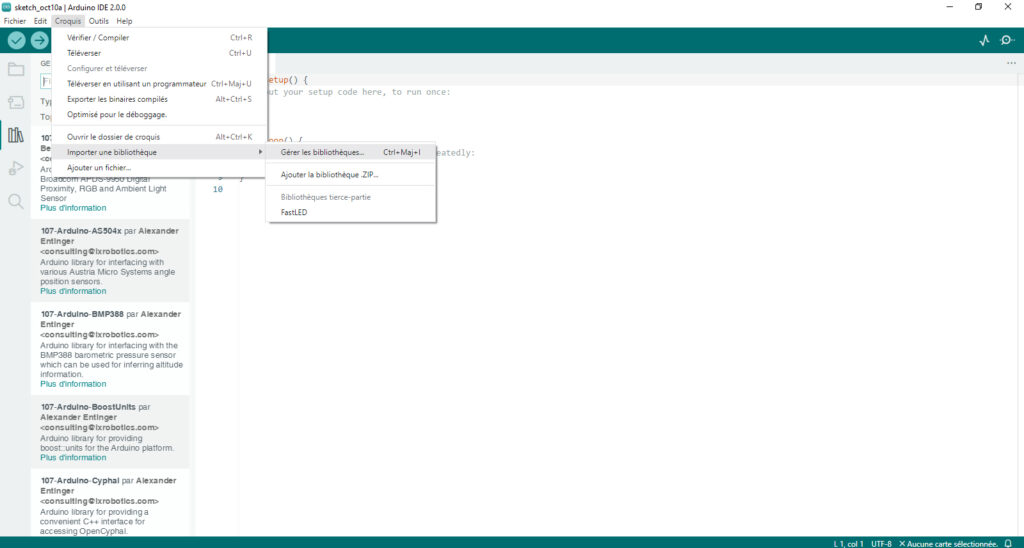
Installez ensuite FastLed
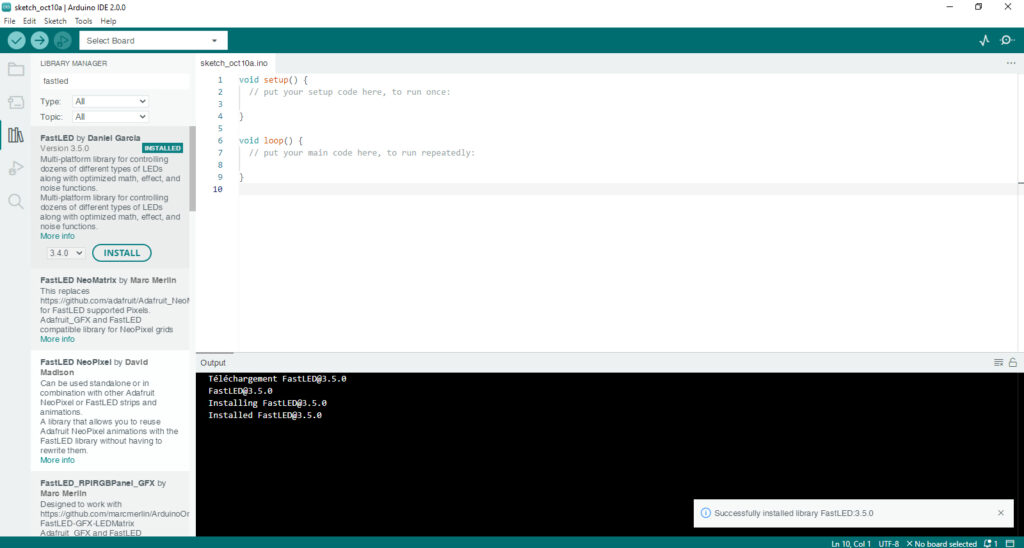
Une fois la librairie installée, rendez-vous dans « Fichiers » > « Exemples » > « FastLEd » et j’ai enfin choisi l’exemple « ColorPalette ».

Dans cette librairie vous pouvez en début de code initialiser le nombre de LED suivant le type de ruban que vous possédez.
Pour définir le nombre de led (8 dans mon cas) il faut modifier la ligne suivante:
#define NUM_LEDS 8
Pour définir la broche PWM sur laquelle vous avez brancher votre ruban LED modifiez la ligne de code suivante :
#define LED_PIN 5
En dehors du ruban led standard enroulé et flexible, il existe des modules circulaires ou droits et rigides directement soudés sur PCB c’est ce que j’utilise dans cet article mais le fonctionnement reste identiquement le même.
#include <FastLED.h>

#define LED_PIN     5
#define NUM_LEDS    8
#define BRIGHTNESS  64
#define LED_TYPE    WS2811
#define COLOR_ORDER GRB
CRGB leds[NUM_LEDS];

#define UPDATES_PER_SECOND 100

// This example shows several ways to set up and use 'palettes' of colors
// with FastLED.
//
// These compact palettes provide an easy way to re-colorize your
// animation on the fly, quickly, easily, and with low overhead.
//
// USING palettes is MUCH simpler in practice than in theory, so first just
// run this sketch, and watch the pretty lights as you then read through
// the code.  Although this sketch has eight (or more) different color schemes,
// the entire sketch compiles down to about 6.5K on AVR.
//
// FastLED provides a few pre-configured color palettes, and makes it
// extremely easy to make up your own color schemes with palettes.
//
// Some notes on the more abstract 'theory and practice' of
// FastLED compact palettes are at the bottom of this file.


CRGBPalette16 currentPalette;
TBlendType    currentBlending;

extern CRGBPalette16 myRedWhiteBluePalette;
extern const TProgmemPalette16 myRedWhiteBluePalette_p PROGMEM;


void setup() {
    delay( 3000 ); // power-up safety delay
    FastLED.addLeds<LED_TYPE, LED_PIN, COLOR_ORDER>(leds, NUM_LEDS).setCorrection( TypicalLEDStrip );
    FastLED.setBrightness(  BRIGHTNESS );

    currentPalette = RainbowColors_p;
    currentBlending = LINEARBLEND;
}


void loop()
{
    ChangePalettePeriodically();

    static uint8_t startIndex = 0;
    startIndex = startIndex + 1; /* motion speed */

    FillLEDsFromPaletteColors( startIndex);

    FastLED.show();
    FastLED.delay(1000 / UPDATES_PER_SECOND);
}

void FillLEDsFromPaletteColors( uint8_t colorIndex)
{
    uint8_t brightness = 255;

    for( int i = 0; i < NUM_LEDS; ++i) {
        leds[i] = ColorFromPalette( currentPalette, colorIndex, brightness, currentBlending);
        colorIndex += 3;
    }
}


// There are several different palettes of colors demonstrated here.
//
// FastLED provides several 'preset' palettes: RainbowColors_p, RainbowStripeColors_p,
// OceanColors_p, CloudColors_p, LavaColors_p, ForestColors_p, and PartyColors_p.
//
// Additionally, you can manually define your own color palettes, or you can write
// code that creates color palettes on the fly.  All are shown here.

void ChangePalettePeriodically()
{
    uint8_t secondHand = (millis() / 1000) % 60;
    static uint8_t lastSecond = 99;

    if( lastSecond != secondHand) {
        lastSecond = secondHand;
        if( secondHand ==  0)  { currentPalette = RainbowColors_p;         currentBlending = LINEARBLEND; }
        if( secondHand == 10)  { currentPalette = RainbowStripeColors_p;   currentBlending = NOBLEND;  }
        if( secondHand == 15)  { currentPalette = RainbowStripeColors_p;   currentBlending = LINEARBLEND; }
        if( secondHand == 20)  { SetupPurpleAndGreenPalette();             currentBlending = LINEARBLEND; }
        if( secondHand == 25)  { SetupTotallyRandomPalette();              currentBlending = LINEARBLEND; }
        if( secondHand == 30)  { SetupBlackAndWhiteStripedPalette();       currentBlending = NOBLEND; }
        if( secondHand == 35)  { SetupBlackAndWhiteStripedPalette();       currentBlending = LINEARBLEND; }
        if( secondHand == 40)  { currentPalette = CloudColors_p;           currentBlending = LINEARBLEND; }
        if( secondHand == 45)  { currentPalette = PartyColors_p;           currentBlending = LINEARBLEND; }
        if( secondHand == 50)  { currentPalette = myRedWhiteBluePalette_p; currentBlending = NOBLEND;  }
        if( secondHand == 55)  { currentPalette = myRedWhiteBluePalette_p; currentBlending = LINEARBLEND; }
    }
}

// This function fills the palette with totally random colors.
void SetupTotallyRandomPalette()
{
    for( int i = 0; i < 16; ++i) {
        currentPalette[i] = CHSV( random8(), 255, random8());
    }
}

// This function sets up a palette of black and white stripes,
// using code.  Since the palette is effectively an array of
// sixteen CRGB colors, the various fill_* functions can be used
// to set them up.
void SetupBlackAndWhiteStripedPalette()
{
    // 'black out' all 16 palette entries...
    fill_solid( currentPalette, 16, CRGB::Black);
    // and set every fourth one to white.
    currentPalette[0] = CRGB::White;
    currentPalette[4] = CRGB::White;
    currentPalette[8] = CRGB::White;
    currentPalette[12] = CRGB::White;

}

// This function sets up a palette of purple and green stripes.
void SetupPurpleAndGreenPalette()
{
    CRGB purple = CHSV( HUE_PURPLE, 255, 255);
    CRGB green  = CHSV( HUE_GREEN, 255, 255);
    CRGB black  = CRGB::Black;

    currentPalette = CRGBPalette16(
                                   green,  green,  black,  black,
                                   purple, purple, black,  black,
                                   green,  green,  black,  black,
                                   purple, purple, black,  black );
}


// This example shows how to set up a static color palette
// which is stored in PROGMEM (flash), which is almost always more
// plentiful than RAM.  A static PROGMEM palette like this
// takes up 64 bytes of flash.
const TProgmemPalette16 myRedWhiteBluePalette_p PROGMEM =
{
    CRGB::Red,
    CRGB::Gray, // 'white' is too bright compared to red and blue
    CRGB::Blue,
    CRGB::Black,

    CRGB::Red,
    CRGB::Gray,
    CRGB::Blue,
    CRGB::Black,

    CRGB::Red,
    CRGB::Red,
    CRGB::Gray,
    CRGB::Gray,
    CRGB::Blue,
    CRGB::Blue,
    CRGB::Black,
    CRGB::Black
};


// Additional notes on FastLED compact palettes:
//
// Normally, in computer graphics, the palette (or "color lookup table")
// has 256 entries, each containing a specific 24-bit RGB color.  You can then
// index into the color palette using a simple 8-bit (one byte) value.
// A 256-entry color palette takes up 768 bytes of RAM, which on Arduino
// is quite possibly "too many" bytes.
//
// FastLED does offer traditional 256-element palettes, for setups that
// can afford the 768-byte cost in RAM.
//
// However, FastLED also offers a compact alternative.  FastLED offers
// palettes that store 16 distinct entries, but can be accessed AS IF
// they actually have 256 entries; this is accomplished by interpolating
// between the 16 explicit entries to create fifteen intermediate palette
// entries between each pair.
//
// So for example, if you set the first two explicit entries of a compact
// palette to Green (0,255,0) and Blue (0,0,255), and then retrieved
// the first sixteen entries from the virtual palette (of 256), you'd get
// Green, followed by a smooth gradient from green-to-blue, and then Blue.
Contrôler des LEDs adressables ws2812B avec un potentiomètre
Commencez par installer la librairie NeoPixel d’Adafruit
Pour cela allez dans « Croquis » > « Importer une bibliothèque » > » Gérer les bibliothèques » et recherchez « adafruit neopixel »
Connectez votre module ws2812b à votre Arduino
DIn > pin 5 de l’Arduino
VCC > 5V de l’Arduino
GND > GND de l’Arduino
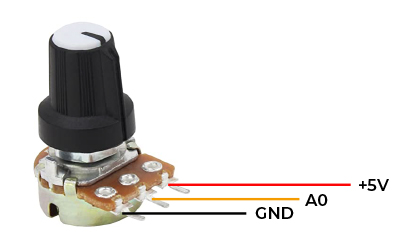
Connectez ensuite un potentiomètre comme ci-dessous
Téléversez ce code sur votre Arduino
(N’oubliez pas de modifier #define NUMPIXELS 8 en fonction de votre ruban).
#include <Adafruit_NeoPixel.h>
#ifdef __AVR__
 #include <avr/power.h>
#endif

#define PIN        5
#define NUMPIXELS 8 // Nombre de led sur votre module / ruban

Adafruit_NeoPixel pixels(NUMPIXELS, PIN, NEO_GRB + NEO_KHZ800);

#define DELAYVAL 0

void setup() {

#if defined(__AVR_ATtiny85__) && (F_CPU == 16000000)
  clock_prescale_set(clock_div_1);
#endif

  pixels.begin();
  Serial.begin(9600);
}

void loop() {
    int sensorValue = analogRead(A0);
    int val = map(sensorValue, 0, 1023, 0, 8);
    Serial.println(val);
    pixels.clear();

    for (int i=0; i<=val; i++)
    { // i = à 0; tant que i est inférieur à 10; incrémente i

      pixels.setPixelColor(i, pixels.Color(200, 0, 200));
      pixels.show();
      delay(DELAYVAL);

    }
}
Si tout s’est bien passez lorsque vous tournerez votre potentiomètre vous constaterez l’allumage des LEDS en fonction de la position de votre potentiomètre.
Quelques exemples d’application
Une installation LED sous un lit / derrière un meuble
Une lampe d’ambiance
Une lampe qui réagit au son
Un Vumètre


0 commentaires